Make small spaces feel airy and bright with nine strategic mirror placements, from opposite windows to behind lamps, plus quick tips on size, height, and saf...
Havitza Home
A No-Regrets Gallery Wall Plan (No Extra Holes)
Plan, test, and hang a gallery wall with confidence using paper templates, painter’s tape, and foolproof spacing tips so you only make holes once.

Clara Jenkins
Clara Jenkins is a former theater set designer turned interior styling expert with over a decade of experience transforming everyday spaces into beautiful sanctuaries. Through her work at havitza.com, she shares practical styling tips, accessible furniture layouts, and inspiring color palettes to help anyone create a home they truly love.
Published October 17, 2026
Updated October 17, 2026
I learned to hang gallery walls in theater, where you do not get to “eyeball it” when opening night is in two hours and the director has notes. The good news is you can steal that same set designer trick at home: build the wall at full scale before you commit to nails.
This tutorial is my no-regrets method for planning and hanging a gallery wall without making extra holes. We are going to curate your pieces, map them with paper templates, and hang with repeatable spacing so it looks intentional, calm, and finished.
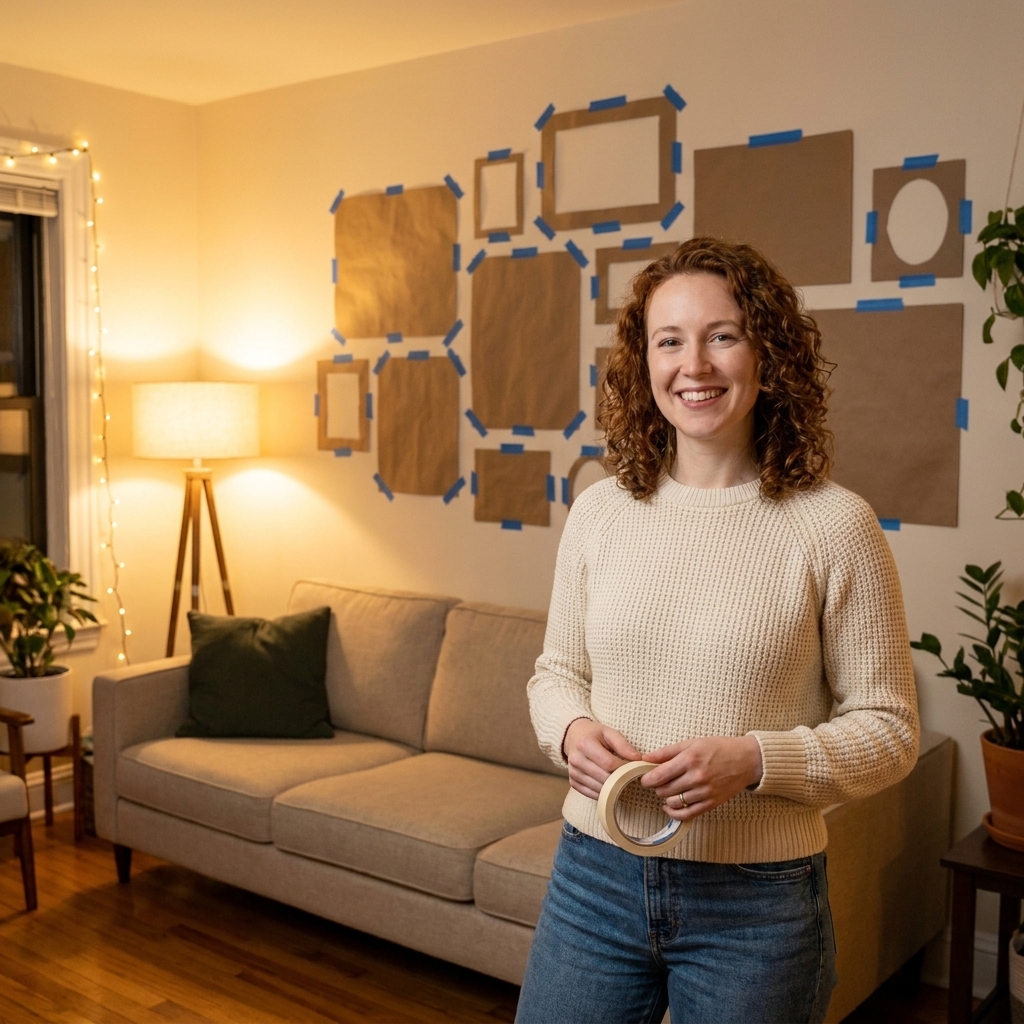
Start with a simple plan
Before you pick up a hammer, decide these three things. They will save you from the classic spiral of moving one frame, then moving every frame.
- Your wall story: What do you want it to feel like, calm and airy, collected and vintage, bold and graphic?
- Your boundary: The invisible rectangle your gallery wall will live inside. Common boundaries are centered over a sofa, within the width of a console, or between two windows.
- Your anchor: The piece that sets the tone and the scale. Often it is the largest frame, a mirror, or a standout print.
If you are hanging above furniture, a common guideline is to keep the bottom edge of the whole arrangement about 6 to 10 inches above the top of the sofa or console. Keeping it close reads cohesive. Too high reads like the art is floating away.
Gather and curate your pieces
Choose a mix, not a match
The easiest way to make a gallery wall look expensive is to repeat a few elements on purpose. Pick two or three of these to repeat:
- Frame color: all black, all light wood, or a tight mix like black plus brass
- Mat style: all matted, or all full-bleed, or one hero piece unmatted and the rest matted
- Color palette: mostly warm neutrals, mostly cool tones, or one accent color that appears in multiple pieces
- Theme: travel photos, abstract line art, botanicals, family snapshots, or a collected objects wall (art plus small mirror plus textile)
Pick a ratio that feels balanced
Try this formula if you are unsure:
- 60% calm: softer pieces, neutrals, simple photography, light negative space
- 30% medium: patterns, landscapes, medium contrast
- 10% punch: one bold piece, a dark frame, or a saturated color that wakes the whole wall up
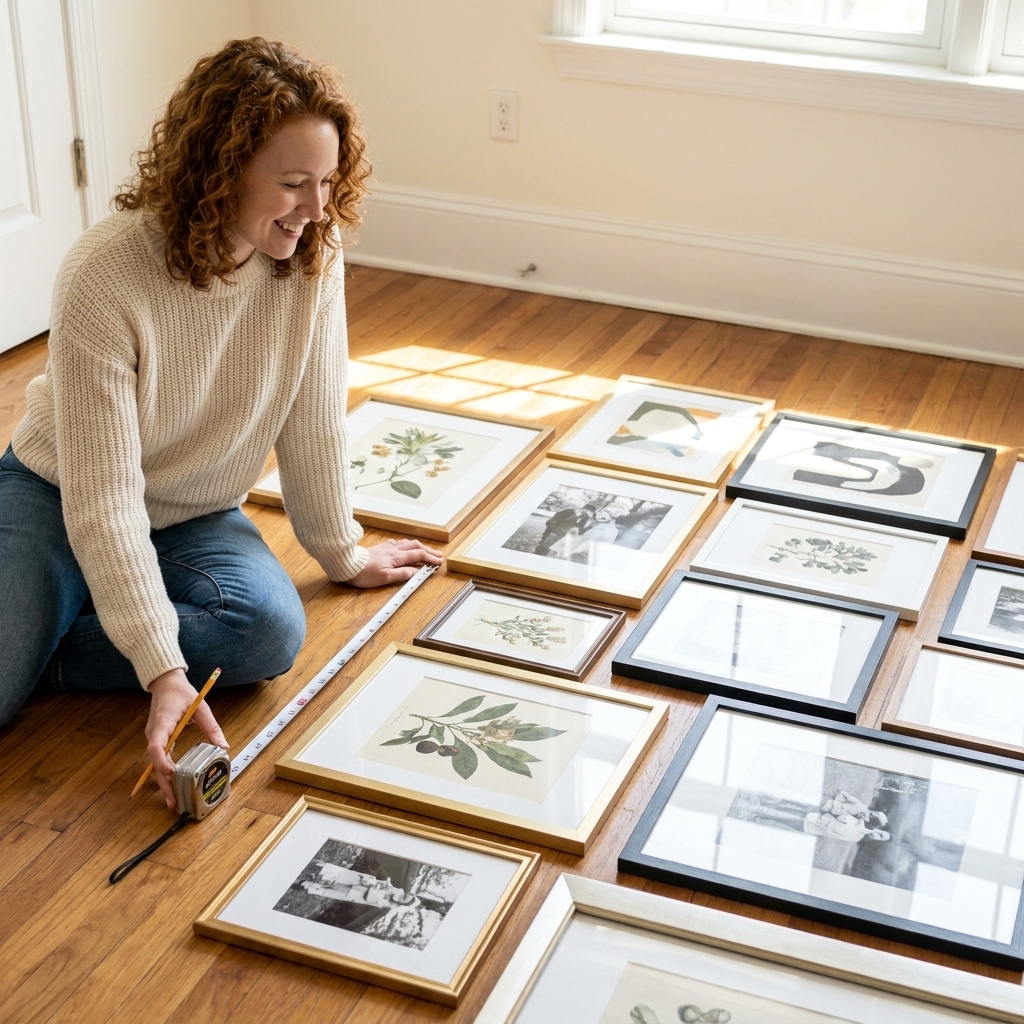
Do a floor test first
Lay everything on the floor and take a quick photo. Your camera will spot what your eyes forgive in the moment: one frame that is too tiny, one color that is shouting, or a random gap that looks accidental.
Tools and supplies
- Painter’s tape (gentle release is best)
- Large kraft paper, butcher paper, or recycled packing paper
- Pencil and scissors
- Tape measure
- Level (a small torpedo level works great)
- Stud finder (optional, helpful for heavy pieces)
- Hanging hardware: frame hooks, nails, wall anchors, or a picture rail system
- Bumpers: felt pads or rubber wall bumpers for the frame corners
If you are hanging anything heavier than about 10 to 15 pounds, plan for a stud or a properly rated anchor for your wall. Always follow the specific hook or anchor rating and match it to your wall type (drywall, plaster, masonry), because capacities vary a lot by material and model.
Make paper templates
Step 1: Trace each frame
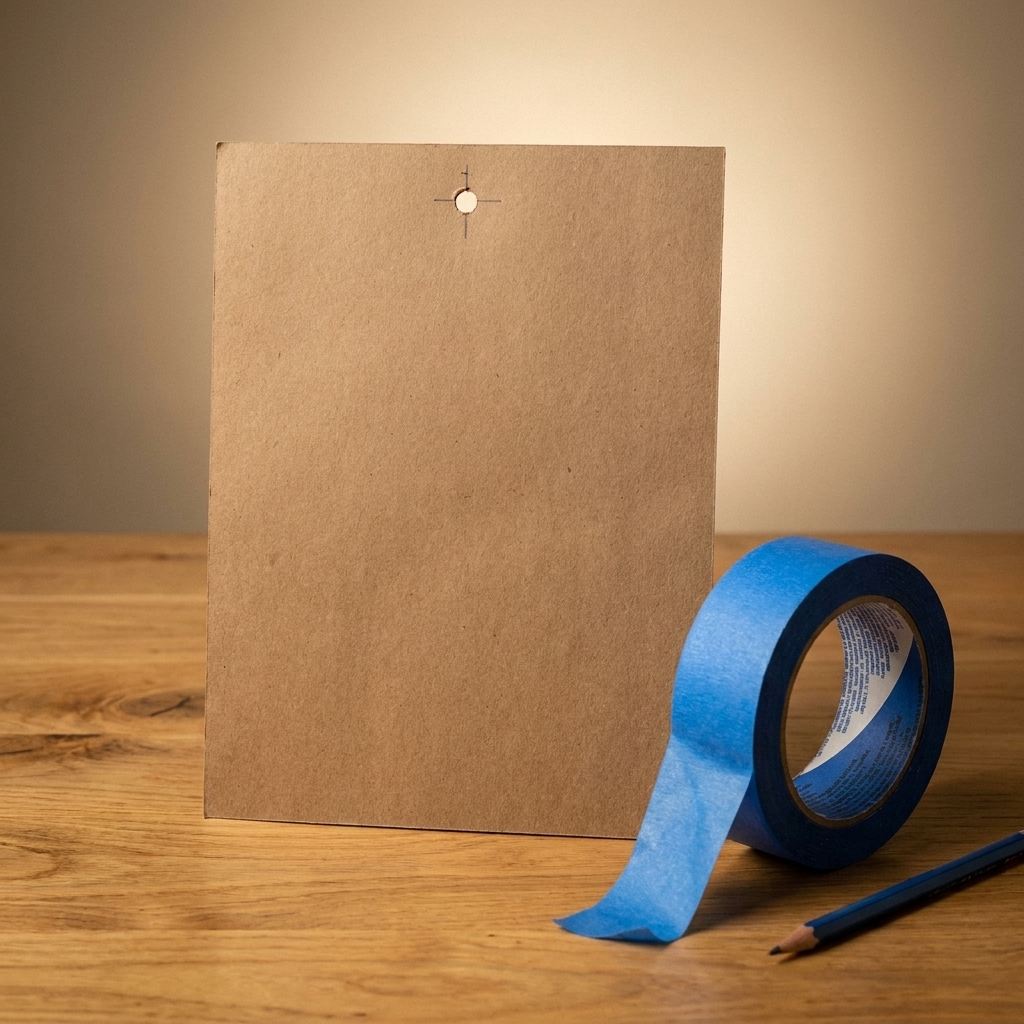
Flip a frame over on paper and trace around it. Cut it out. Write on the front what it is: “8x10 family photo, black frame” so you are not guessing later.
Step 2: Mark the hanging point
This is the secret to one-and-done holes.
- Measure the distance from the top of the frame to the hanger on the back (sawtooth, D-rings, or the highest point of the wire when pulled taut).
- Transfer that measurement onto the paper template.
- Mark the exact spot where the nail or hook should go, then poke a small hole through the paper at that point.
If your frame has a wire, pull it taut the way it will sit when it is hanging, then measure to that high point. Wires sag differently once weight is on them, so this keeps your final placement honest.
Step 3: Label orientation
Add “TOP” on the template. It sounds silly until you tape a landscape template in portrait and wonder why nothing fits.
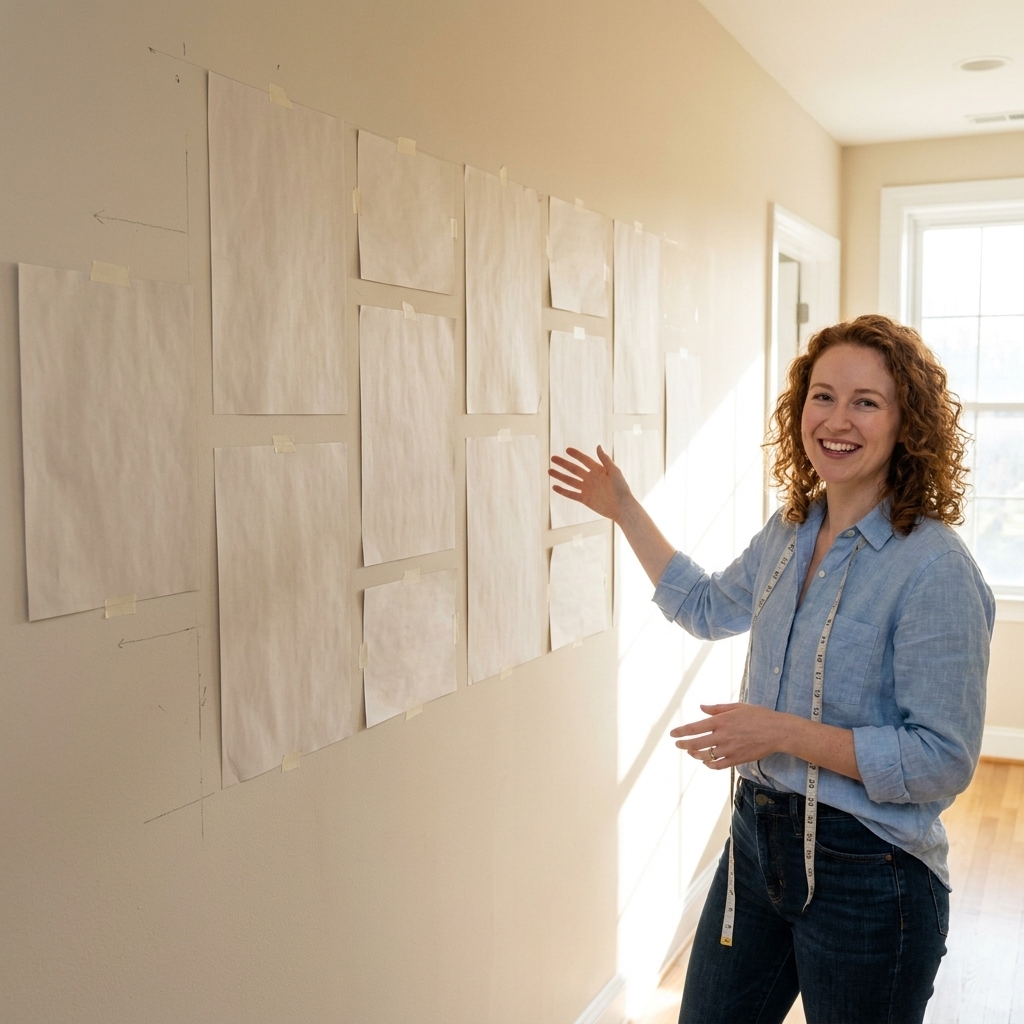
Tape the layout on the wall
Choose your spacing rule
Spacing is where gallery walls either look intentional or like they happened accidentally.
- Classic spacing: 2 inches between frames
- Tighter, modern spacing: 1 to 1.5 inches
- Airy, eclectic spacing: 2.5 to 3 inches (best when you have fewer pieces and larger frames)
Pick one spacing range and stick to it. Consistency is what makes mixed art feel cohesive.
Build from your anchor
Tape your anchor template first. Center it within your boundary, or align it to a key line in the room, like the center of the sofa or the midpoint between two sconces.
Then add templates around it, stepping outward like you are blocking actors on a stage: anchor first, then supporting roles, then fillers.
Step back like a designer
Do not judge the layout from two feet away. Step back to the doorway. Sit on the sofa. Walk past it. Gallery walls live in motion.
If something feels off, it usually is one of these:
- A heavy cluster on one side
- Too many tiny pieces without a visual anchor
- Random spacing that changes from gap to gap
- One frame that is rotated slightly, creating invisible chaos
Pick a layout style
Grid
Best for: same-size frames, modern spaces, calming symmetry. Use a grid when you want the wall to feel tidy and architectural.
Salon
Best for: collected art, vintage finds, mixed sizes. The trick is to keep spacing consistent and make sure the overall outer shape looks balanced.
Linear
Best for: narrow walls, hallways, above a long console. Great when you want impact without the visual busyness of a full cluster.
Stairs
Best for: stairs and landings. Keep a consistent imaginary line that follows the stair angle, either along the frame tops or centers.
Hang it with confidence
Step 1: Transfer nail locations
Once all templates are taped exactly where you want them, use a pencil to mark the wall through the tiny punched hole at each hanging point.
Then remove only one template at a time, install the hardware at that mark, and hang that frame before moving to the next. This keeps you from accidentally shifting your plan midstream.
Step 2: Use the right hardware
- Light frames: small nail or frame hook
- Medium frames: frame hook with a rated capacity
- Heavy frames or mirrors: stud placement or heavy-duty anchors, or use two hooks for stability if the frame allows
For wide frames that can take two hooks, measure the hook-to-hook distance on the back, mark a level line on the wall, then place both hooks on that line so the frame cannot swivel.
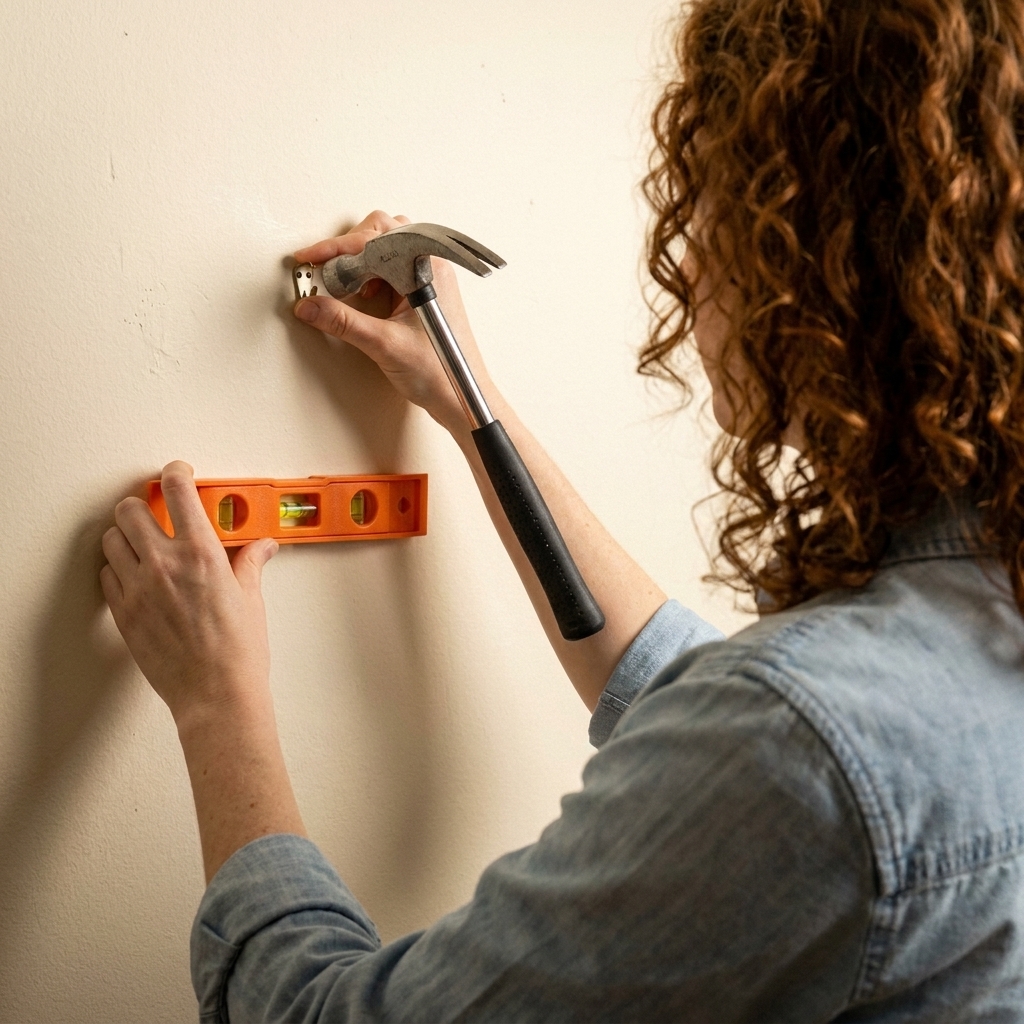
Step 3: Level, then add bumpers
Level each frame as you hang it. Then add felt bumpers to the lower back corners so the frame sits straight and does not scuff the wall. Bumpers also help keep frames from slowly tilting over time.
No extra holes safeguards
- Use painter’s tape rails: run a horizontal tape line where the bottoms of a row should hit. It is a simple visual guide.
- Photograph the taped layout: if you pause mid-project, you will know exactly what goes where.
- Keep a spacer on hand: a folded index card, a 2-inch scrap of cardboard, or even a slim book keeps gaps consistent without constant measuring.
- Hang the biggest pieces first: small pieces are flexible. Big ones are not.
- Stop when it feels done: not every blank inch needs art. A little breathing room is part of the design.
Common mistakes and fixes
Mistake: The wall is too high
Fix: Lower the arrangement so it relates to furniture. If there is no furniture, a common gallery guideline is to aim for the center of the arrangement to sit around 57 to 60 inches from the floor, which is close to average eye level.
Mistake: Frames feel scattered
Fix: Tighten spacing and define an outer boundary. Even salon-style layouts need a clear overall shape.
Mistake: Too many tiny frames
Fix: Add one larger anchor piece, a mirror, or a medium-to-large mat that gives a small print more visual weight.
Mistake: Reflections and glare
Fix: Shift glossy frames away from direct window reflection zones, or swap one or two for matte frames or a textile piece to break up glare.
FAQ
How many pieces do I need?
Enough to create a clear shape. Over a sofa, 5 to 9 pieces is a comfortable range for most living rooms, but scale matters more than count. A few larger frames can look more polished than a dozen tiny ones.
Should all my frames match?
No. Repetition is the goal, not identical frames. Matching mats or repeating one frame finish across the wall is often enough to make mixed art feel cohesive.
What if I hate my art once it is up?
Keep the layout and swap the contents. This is why a consistent frame set works so well: you can rotate seasonal prints, kid art, postcards, or thrifted sketches without redoing the wall.
Can I do this without nails?
For lightweight frames, removable hanging strips can work well. Still use templates and plan your layout first. The same one-and-done logic applies, even without holes.
A quick finishing touch
Once everything is hung, add one small unifying element nearby: a warm table lamp, a vintage rug beneath the furniture, or a textured throw on the sofa. Gallery walls look best when the room around them is also telling the same story.